Ultralytics 使用记录
背景
本文主要基于 当前最新版本 YOLOv8 展开
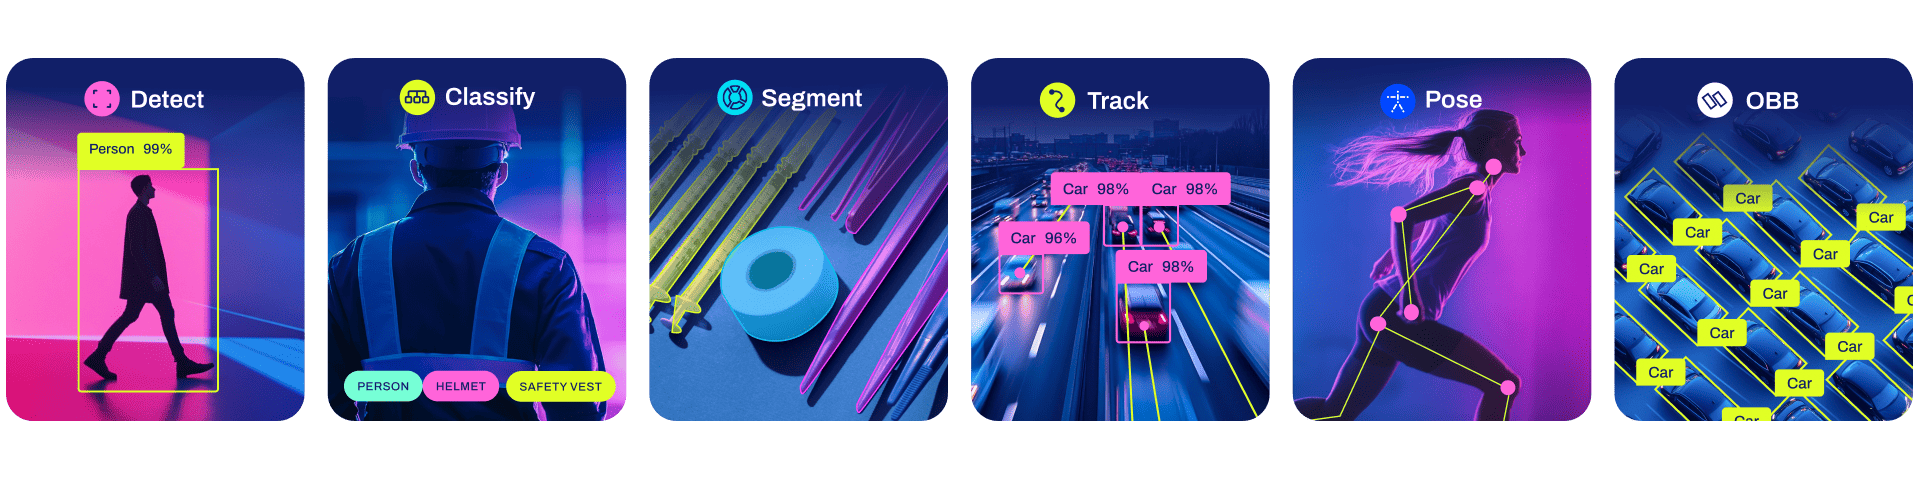
YOLOv8 is an AI framework that supports multiple computer vision tasks. The framework can be used to perform detection, segmentation, obb, classification, and pose estimation. Each of these tasks has a different objective and use case.
安装
一般最好先安装 PyTorch 相关包
pip3 install torch torchvision torchaudio
pip install ultralytics
使用
快速使用
分类
判断图片是什么 / 含有什么
Image classification is the simplest of the three tasks and involves classifying an entire image into one of a set of predefined classes.
支持的模型有 : yolov8n-cls / yolov8s-cls / yolov8m-cls / yolov8l-cls / yolov8x-cls
Python推断
from ultralytics import YOLO

# Load a model
model = YOLO('yolov8n-cls.pt')  # load an official model
# model = YOLO('path/to/best.pt')  # load a custom model

# Predict with the model
results = model('https://ultralytics.com/images/bus.jpg')  # predict on an image
# results = model(['im1.jpg', 'im2.jpg'])  # return a list of Results objects / 还有一个 stream=True 模式
结果使用
names = results[0].names # 所以类别
[names[x] for x in results[0].probs.top5] #分类
results[0].probs.top5conf.numpy() # 概率
names[results[0].probs.top1] # 最大概率
CLI
yolo classify predict model=yolov8n-cls.pt source='https://ultralytics.com/images/bus.jpg'  # predict with official model
yolo classify predict model=path/to/best.pt source='https://ultralytics.com/images/bus.jpg'  # predict with custom model
目标检测
判断图片中有什么并且目标在图片中什么位置
Object detection is a task that involves identifying the location and class of objects in an image or video stream.
支持的模型有 : yolov8n / yolov8s / yolov8m / yolov8l / yolov8x
Python推断
from ultralytics import YOLO

# Load a model
model = YOLO('yolov8n.pt')  # load an official model
# model = YOLO('path/to/best.pt')  # load a custom model

# Predict with the model
results = model('https://ultralytics.com/images/bus.jpg')  # predict on an image
结果使用
[results[0].names[x] for x in results[0].boxes.cls.numpy().astype('int')] # 分类
results[0].boxes.xyxy # 方框
results[0].boxes.conf.numpy() # 概率
# 简单绘制结果
result = results[0]
from PIL import Image, ImageDraw
image = Image.open("bus.jpg")
draw = ImageDraw.Draw(image)
for i in range(len(result.boxes.xyxy)):
    x1, y1, x2, y2 = results[0].boxes.xyxy[i].numpy()
    draw.rectangle((x1, y1, x2, y2), outline=(0, 255, 0), width=1)
    draw.text((x1, y1),
          result.names[result.boxes.cls.numpy().astype('int')[i]]
          , fill=(0, 255, 0),font_size=20)
image
CLI
yolo detect predict model=yolov8n.pt source='https://ultralytics.com/images/bus.jpg'  # predict with official model
yolo detect predict model=path/to/best.pt source='https://ultralytics.com/images/bus.jpg'  # predict with custom model
目标检测 使用 streamlit 展示 ( camera_input - 拍照操作)
import streamlit as st
from ultralytics import YOLO
import streamlit as st
from PIL import Image, ImageDraw

model = YOLO('yolov8n.pt')  # load an official model

img_file_buffer = st.camera_input("Take a picture")

def get_processed_image(img_file_buffer):
    img = Image.open(img_file_buffer)
    result = model(img)[0]  # predict on an image
    image = img.copy()  # get original image
    draw = ImageDraw.Draw(image)
    for i in range(len(result.boxes.xyxy)):
        x1, y1, x2, y2 = result.boxes.xyxy[i].numpy()
        draw.rectangle((x1, y1, x2, y2), outline=(0, 255, 0), width=1)
        # darw label text
        draw.text((x1, y1),
                    result.names[result.boxes.cls.numpy().astype('int')[i]] + ' | Prob : ' + str(round(result.boxes.conf.numpy()[i],2))
                    , fill=(0, 255, 0),font_size=15)
    objs = [result.names[i] for i in result.boxes.cls.numpy().astype('int')]
    return img,image,objs

if img_file_buffer is not None:
    img,image,objs = get_processed_image(img_file_buffer)
    st.write(objs)
    st.image(image, caption='Processed Image', use_column_width=True)
语义分割
判断图片中有什么并且给出目标在图片中的边缘(可抠图)
Instance segmentation goes a step further than object detection and involves identifying individual objects in an image and segmenting them from the rest of the image.
支持的模型有 : yolov8n-seg / yolov8s-seg / yolov8m-seg / yolov8l-seg / yolov8x-seg
Python推断
from ultralytics import YOLO

# Load a model
model = YOLO('yolov8n-seg.pt')  # load an official model
# model = YOLO('path/to/best.pt')  # load a custom model

# Predict with the model
results = model('https://ultralytics.com/images/bus.jpg')  # predict on an image
结果使用
[results[0].names[x] for x in results[0].boxes.cls.numpy().astype('int')] # 分类
results[0].boxes.xyxy # 方框
results[0].boxes.conf.numpy() # 概率
results[0].masks # Mask
# Mask 简单预览
import matplotlib.pyplot as plt
plt.imshow(results[0].masks[0].data.squeeze())

# Mask 使用
image = Image.open("bus.jpg")
index = 1
get_mask_merge(image,results[0].masks[index].data.squeeze())
get_mask_area(image,results[0].masks[index].data.squeeze(),transpart = True,dark = False,box = results[0].boxes.xyxy[index].numpy())
MASK 辅助函数
import cv2

def get_mask_merge(img,mask):
    resized_mask = cv2.resize(mask.detach().numpy(), img.size, interpolation =cv2.INTER_NEAREST)
    img_with_mask = Image.blend(img.convert("RGBA"),Image.fromarray(resized_mask > 0.5).convert("RGBA"),0.5)
    return img_with_mask

def get_mask_area(img,mask,transpart = True,dark = False,box = None):
    resized_mask = cv2.resize(mask.detach().numpy(), img.size, interpolation =cv2.INTER_NEAREST)
    img_new = np.array(img) * (resized_mask > 0.5)[:,:,None]
    if dark:
        img_new[resized_mask < 0.5] = 255
        return Image.fromarray(img_new)
    img_in_mask = Image.fromarray(img_new)
    if transpart:
        img_in_mask_array = np.array(img_in_mask.convert("RGBA"))
        img_in_mask_array[:,:,3] = img_in_mask_array[:,:,3] * (resized_mask > 0.5)
        img_in_mask = Image.fromarray(img_in_mask_array)

    if box is not None:
      img_in_mask = img_in_mask.crop(box)
    return img_in_mask
CLI
yolo segment predict model=yolov8n-seg.pt source='https://ultralytics.com/images/bus.jpg'  # predict with official model
yolo segment predict model=path/to/best.pt source='https://ultralytics.com/images/bus.jpg'  # predict with custom model
语义分割 使用 streamlit 展示 ( camera_input - 拍照操作)
import streamlit as st
from ultralytics import YOLO
import streamlit as st
from PIL import Image
import cv2
import numpy as np

model = YOLO('yolov8n-seg.pt')  # load an official model

img_file_buffer = st.camera_input("Take a picture")

def get_mask_area(img,mask,transpart = True,dark = False,box = None):
    resized_mask = cv2.resize(mask.detach().numpy(), img.size, interpolation =cv2.INTER_NEAREST)
    img_new = np.array(img) * (resized_mask > 0.5)[:,:,None]
    if dark:
        img_new[resized_mask < 0.5] = 255
        return Image.fromarray(img_new)
    img_in_mask = Image.fromarray(img_new)
    if transpart:
        img_in_mask_array = np.array(img_in_mask.convert("RGBA"))
        img_in_mask_array[:,:,3] = img_in_mask_array[:,:,3] * (resized_mask > 0.5)
        img_in_mask = Image.fromarray(img_in_mask_array)

    if box is not None:
      img_in_mask = img_in_mask.crop(box)
    return img_in_mask

def get_mask_merge(img,mask):
    resized_mask = cv2.resize(mask.detach().numpy(), img.size, interpolation =cv2.INTER_NEAREST)
    img_with_mask = Image.blend(img.convert("RGBA"),Image.fromarray(resized_mask > 0.5).convert("RGBA"),0.5)
    return img_with_mask

def get_processed_image(img_file_buffer):
    img = Image.open(img_file_buffer)
    result = model(img)[0]  # predict on an image
    mask_area_list = []
    mask_merge_list = []
    for index in range(len(result.boxes.xyxy)):
        mask_area_temp = get_mask_area(img ,result.masks[index].data.squeeze(),transpart = True,dark = False,box = result.boxes.xyxy[index].numpy())
        mask_merge_temp = get_mask_merge(img ,result.masks[index].data.squeeze())
        mask_area_list.append(mask_area_temp)
        mask_merge_list.append(mask_merge_temp)
    names = [result.names[i] for i in result.boxes.cls.numpy().astype('int')]
    probs = [round(i,2) for i in result.boxes.conf.numpy()]

    return img,mask_area_list,mask_merge_list,names,probs

if img_file_buffer is not None:
    img,mask_area_list,mask_merge_list,names,probs = get_processed_image(img_file_buffer)

    st.image(img, caption='Original Image', use_column_width=True)
    for index in range(len(mask_area_list)):
        c1,c2 = st.columns(2)
        with c1:
            st.image(mask_area_list[index], caption=names[index] + ' | Prob : ' + str(probs[index]), use_column_width=True)
        with c2:
            st.image(mask_merge_list[index], caption=names[index] + ' | Prob : ' + str(probs[index]), use_column_width=True)
姿态识别
判断图片中的关键点位,例如人体的关节
Pose estimation is a task that involves identifying the location of specific points in an image, usually referred to as keypoints. The keypoints can represent various parts of the object such as joints, landmarks, or other distinctive features.
支持的模型有 : yolov8n-pose / yolov8s-pose / yolov8m-pose / yolov8l-pose / yolov8x-pose
Python推断
from ultralytics import YOLO

# Load a model
model = YOLO('yolov8n-pose.pt')  # load an official model
# model = YOLO('path/to/best.pt')  # load a custom model

# Predict with the model
results = model('https://ultralytics.com/images/bus.jpg')  # predict on an image
结果使用
results[0].names # 分类(主要是人)
results[0].boxes.xyxy # 方框
results[0].boxes.conf.numpy() # 概率
results[0].keypoints # 关键点
COCO 17 个关键点所对应的人体部位包括:0: 鼻子、1: 左眼、2: 右眼、3: 左耳、4: 右耳、5: 左肩、6: 右肩、7: 左肘、8: 右肘、9: 左腕、10: 右腕、11: 左胯、12: 右胯、13: 左膝、14: 右膝、15: 左踝、16: 右踝。
# 简单绘制结果
from PIL import Image, ImageDraw
image = Image.open("bus.jpg")
draw = ImageDraw.Draw(image)
i = 2
x1, y1, x2, y2 = results[0].boxes.xyxy[i].numpy()
draw.rectangle((x1, y1, x2, y2), outline=(0, 255, 0), width=2)
draw.point([(x[0],x[1]) for x in results[0].keypoints[i].xy[0].numpy()][:3])
image
视频流模式
主要是 model 开启 stream 模式
读取视频做物体识别 demo(识别后绘制输出 GIF / MP4)
import cv2
from ultralytics import YOLO

# Load a model
model = YOLO('yolov8n.pt')  # load an official model
# model = YOLO('path/to/best.pt')  # load a custom model

# Get the frame rate of the original video
cap = cv2.VideoCapture('sample-5s.mp4')
fps = cap.get(cv2.CAP_PROP_FPS)
cap.release()

# Predict with the model
results = model('sample-5s.mp4',stream=True)  # predict on an image

from PIL import Image, ImageDraw
gif = []
frames = []
for result in results:
  # 简单绘制结果
  image = Image.fromarray(result.orig_img)
  draw = ImageDraw.Draw(image)
  for i in range(len(result.boxes.xyxy)):
      x1, y1, x2, y2 = result.boxes.xyxy[i].numpy()
      draw.rectangle((x1, y1, x2, y2), outline=(0, 255, 0), width=2)
  gif.append(image)
  frames.append(cv2.cvtColor(np.array(image), cv2.COLOR_RGB2BGR))

gif[0].save('temp_result.gif', save_all=True,optimize=False, append_images=gif[1:], loop=0)

height, width, layers = frames[0].shape
fourcc = cv2.VideoWriter_fourcc(*'XVID')  # use a codec with higher compression
video = cv2.VideoWriter('output_video.avi', fourcc, fps, (width, height))

for frame in frames:
    video.write(frame)

video.release()
备注:使用本机视频流
import cv2

cap = cv2.VideoCapture(0)
i = 0
while (1):
    ret, frame = cap.read()
    # 转换为灰度图像
    gray = cv2.cvtColor(frame, cv2.COLOR_BGR2GRAY)
    k = cv2.waitKey(1)
    if k == 27:
        break
    elif k == ord('s'):
        # 注意修改保持路径
        cv2.imwrite('./' + str(i) + '.jpg', gray)  # 保存处理后的帧
        i += 1
    cv2.imshow("capture", gray)  # 展示处理后的帧
cap.release()
cv2.destroyAllWindows()
合并代码 (本机视频流做物体识别demo)
import cv2
from ultralytics import YOLO
from PIL import Image, ImageDraw
import numpy as np
import cv2

model = YOLO('yolov8n.pt')  # load an official model

cap = cv2.VideoCapture(0)
i = 0
while (1):
    ret, frame = cap.read()

    result = model(frame)[0]  # predict on an image

    image = Image.fromarray(result.orig_img)  # get original image
    draw = ImageDraw.Draw(image)
    for i in range(len(result.boxes.xyxy)):
        x1, y1, x2, y2 = result.boxes.xyxy[i].numpy()
        draw.rectangle((x1, y1, x2, y2), outline=(0, 255, 0), width=2)
        # darw label text
        draw.text((x1, y1),
                  result.names[result.boxes.cls.numpy().astype('int')[i]]
                  , fill=(0, 255, 0),font_size=20)

    k = cv2.waitKey(1)
    if k == 27:
        break
    elif k == ord('s'):
        # 注意修改保持路径
        cv2.imwrite('./' + str(i) + '.jpg', np.array(image))
        i += 1
    cv2.imshow("capture", np.array(image))
cap.release()
cv2.destroyAllWindows()
使用 streamlit 展示 ( webrtc_streamer - 视频流)
from ultralytics import YOLO
import cv2
import streamlit as st
from PIL import Image, ImageDraw
import numpy as np
import av
from streamlit_webrtc import webrtc_streamer

model = YOLO('yolov8n.pt')  # load an official model

def video_frame_callback(frame: av.VideoFrame) -> av.VideoFrame:
    img = frame.to_ndarray(format="bgr24")
    result = model(img)[0]  # predict on an image
    image = Image.fromarray(result.orig_img)  # get original image
    draw = ImageDraw.Draw(image)
    for i in range(len(result.boxes.xyxy)):
        x1, y1, x2, y2 = result.boxes.xyxy[i].numpy()
        draw.rectangle((x1, y1, x2, y2), outline=(0, 255, 0), width=1)
        # darw label text
        draw.text((x1, y1),
                    result.names[result.boxes.cls.numpy().astype('int')[i]] + ' | Prob : ' + str(round(result.boxes.conf.numpy()[i],2))
                    , fill=(0, 255, 0),font_size=15)


    return av.VideoFrame.from_ndarray(np.array(image), format="bgr24")

st.write("Playground")
ctx = webrtc_streamer(key="example", video_frame_callback=video_frame_callback,media_stream_constraints={"video": True, "audio": False})

# Pull values from the callback
# https://github.com/whitphx/streamlit-webrtc/blob/main/README.md
Tips
# PyAV 使用的是 BGR 颜色空间,而 PIL 使用的是 RGB 颜色空间,所以在转换时需要进行颜色空间的转换。
import numpy as np
from PIL import Image
import av

def video_frame_to_image(video_frame):
    # 将 VideoFrame 转换为 numpy 数组
    frame = video_frame.to_ndarray(format='bgr24')
    # 将 BGR 转换为 RGB
    frame = frame[:, :, ::-1]
    # 将 numpy 数组转换为 PIL Image
    image = Image.fromarray(frame)

    return image
获取每一帧的数据在streamlit 页面中使用 , 利用 st.empty() 实现
from ultralytics import YOLO
import cv2
import streamlit as st
from PIL import Image, ImageDraw
import numpy as np
import av
from streamlit_webrtc import webrtc_streamer
import threading
import matplotlib.pyplot as plt

lock = threading.Lock()
img_container = {"img": None}

model = YOLO('yolov8n.pt')  # load an official model

def video_frame_callback(frame: av.VideoFrame) -> av.VideoFrame:
    img = frame.to_ndarray(format="bgr24")
    img = cv2.flip(img, 1)
    with lock:
        img_container["img"] = img
    # flip frame left and right
    return av.VideoFrame.from_ndarray(img, format="bgr24")

ctx = webrtc_streamer(key="example", video_frame_callback=video_frame_callback,
                      media_stream_constraints={"video": True, "audio": False})


placeholder = st.empty()
image_placeholder = st.empty()
fig_placeholder = st.empty()
fig, ax = plt.subplots(1, 1)

while ctx.state.playing:
    with lock:
        img = img_container["img"]
    if img is None:
        continue

    result = model(img)[0]  # predict on an image
    image = Image.fromarray(img[:, :, ::-1])
    imageDraw = ImageDraw.Draw(image)
    for i in range(len(result.boxes.xyxy)):
        x1, y1, x2, y2 = result.boxes.xyxy[i].numpy()
        imageDraw.rectangle((x1, y1, x2, y2), outline=(0, 255, 0), width=1)
        # darw label text
        imageDraw.text((x1, y1),
                    result.names[result.boxes.cls.numpy().astype('int')[i]] + ' | Prob : ' + str(round(result.boxes.conf.numpy()[i],2))
                    , fill=(0, 255, 0),font_size=15)
        if result.names[result.boxes.cls.numpy().astype('int')[i]] == 'person':
            placeholder.write(f"person detected at {int(x1)},{int(y1)}")
            image_placeholder.image(image, caption='Processed Image', use_column_width=True)

            ax.cla()
            ax.set_xlim(0, img.shape[1])
            ax.set_ylim(0, img.shape[0])
            ax.set_title('person detected')
            ax.scatter(x1,img.shape[0] - y1, s=100, c='blue')
            fig_placeholder.pyplot(fig)
自定义训练
使用用 roboflow 进行训练数据的打标
注册登入,一般使用免费账户就可以
按照流程走然后选择 yolov8 格式输出训练数据
如果是使用代码下载标注好的训练数据一般会给出如下代码
!pip install roboflow

from roboflow import Roboflow
rf = Roboflow(api_key="q3fbMcjlV3SKDhhA3xnM")
project = rf.workspace("test-ms9ap").project("hard-hat-sample-06rcn")
dataset = project.version(2).download("yolov8")
模型训练
from ultralytics import YOLO

# Load a model
# model = YOLO('yolov8n.yaml')  # build a new model from YAML
model = YOLO('yolov8n.pt')  # load a pretrained model (recommended for training)
# model = YOLO('yolov8n.yaml').load('yolov8n.pt')  # build from YAML and transfer weights

# Train the model (data 位置传入训练数据yaml文件的路径)
results = model.train(data='./Hard-Hat-Sample-2/data.yaml', epochs=100, imgsz=640)

# 如果训练数据文件夹位置不对会做类似如下提示
# Note dataset download directory is '/content/datasets'. You can update this in '/root/.config/Ultralytics/settings.yaml'
# 针对如上提示我们把整个训练目录移动到 /content/datasets/ 下即可 或者更新 settings.yaml 文件

# 训练后得到的模型用类似 model = YOLO('path/to/best.pt') 的模式使用